First a recap of construction for the week. I decided to reuse the metal shielding from the screen instead of fabricating something myself. All I needed to do was take the snips to the thing and cut it down to size. A couple of holes drilled for the screws and a quick mount to the oak backing:
I also hacked off part of the bezel to provide some protection to the circuit board and buttons for the power switch, menu button and so on. Pretty neat eh? Now with the circuit boards mounted high on the screen, there's plenty of room for the power and video cables underneath. Also, by reusing the shielding I was able to utilize the mounting holes and then hack down the original mounting bracket.
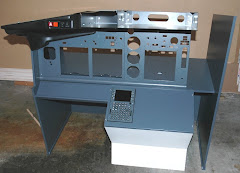
In my last post I was slagging off Engravity for the placement of the uprights that connect the captains console to the center one. Turns out that with the thick aluminum bezel in place on the front, there is plenty of clearance for the LCD without any visual obstruction of the screen edges. So here is "Frankenstein" mounted in place:
Dan's handles arrived on Saturday! Wife comes in the house from the mailbox all smiles - "your plastic samples for your toy are here!". What? Turns out that's what Dan wrote on the customs label on the envelope (gee thanks Dan!). So here they are:
Alright then! Will move up the fabrication of the TQ to get these puppies put to work.
And now back to the lead in part of the story. Took off from SFO no problem. On climb out switched to the auto pilot, hit the LVL CHG button and watched the nose rise up. What didn't work though was LNAV or HDG - no effect at all. I had to take control back and steer it on course manually. The MCP is definitely talking to the computer running FSX, since the speed and altitude settings have an effect on the flight.
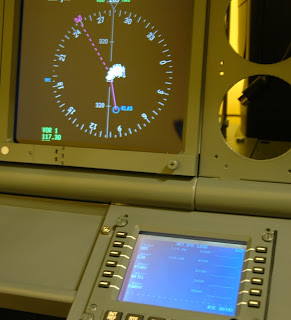
Also noticed that even though the route is in the CDU, it isn't shown correctly in the ND (it just shows direct from SFO to LAS):
So we'll need to get to the bottom of this - not sure if the problems are related or not. Nevertheless, the plane intercepted the localizer on approach and started to head down on the glide slope. Only problem, it was not aligned on the runway - took manual control back and landed without incident (hey not bad considering I haven't flown in months).
Check out the current state photo on the right hand panel. It's another blurry photo (where is my tripod?) but it shows how great the CP flight MCP and EFIS look when light up. You'll notice a projector sitting on top of the glareshield. I borrowed it from work for the weekend. Due to the short video cabble, I couldn't get any distance on the thing from the computer. So no big screen experience this week. A keen eye will also notice a drum crown instead of a captains chair.... not enough room for it - see next paragraph. On the floor where the avionics console should be is my current stack of GoFlight radios.
What else? Well despite taking accurate measurements of the guest bedroom and figuring that the available space would be big enough for the sim, what I failed to take into account was that I'd need room to work behind the thing during construction. So I've talked the wife into moving the weight bench and the rowing machine into the formal living room we never use (in fact we call it the yoga room. Something neither one of us practices...). Cool - more room for the sim!
Next up - fix the problems with Project Magenta and break down yet another LCD monitor for the EICAS...


No comments:
Post a Comment