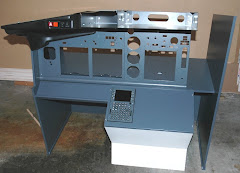
As you know, the build has been put on hold while I work on a built in sideboard for the missus. Before sawing through more lumber than I need to, I decided to draw up some plans in Google SketchUp (don't worry, we'll get back on point in a minute...). I've tried this "free" software in the past and found it a hassle to work with. Too mean to actually purchase some CAD software, I decided to give it another try.
I found an excellent set of instructional videos for SketchUp that are geared towards woodworkers. You can find them here. So if you want to use it to plan your build, I highly recommend it.
If you're interested in the sideboard design, here you go (drop me a line if you want me to send you the SketchUp file):
Now it got me thinking, maybe I could use SketchUp to plan the wrap around screen for the sim. Here's my first crack at it:
Note I still need to add the projectors on the ceiling and check for clearance/coverage but you get the idea. You can also see that I have very little clearance between the door and the right hand edge of the screen. The beauty of this approach is that I can move around the room in 3D to see what fits and what doesn't. I can get a visualization of what I'll see by putting the viewpoint where my head would be and by panning from left to right. What's also apparent is that I'll need to move everything else out of the sim room to get the screen in. Well that will make me popular...
I did take some time out to make some covers for the center console, to fill the holes not taken by instruments. Decided to go with 1/4" plexi glass. First, I took a forstner bit and drilled out anchor points for DZUS. Then trimmed out the remainder with a Stanley knife. Now how to paint? Since the surfaces are polished, I knocked one side down with an orbital sander to scuff it up, to give the paint a surface to key into. I then sprayed with a plastic primer that provides excellent adhesion:
I can't say enough about this stuff. You really need to go to town on it to scratch it off the plastic:
A coat of latex paint later and here's the result:
Not that thrilled with the finish - I rushed it and rolled the paint on too thick, causing air bubbles to form and dry into the surface. Nothing for it - I'll need to buy a spray system...here it is. Isn't she a beauty?
Well it's for the sideboard right? I watched a great review on this British built product at the Wood Whisperer web site. There are a lot of great tutorial videos here that I highly recommend.
Also had a visitor to the sim last week. My colleague Dirk was visiting from Sinsheim, home of the Tecknik museum if you ever find yourself there. Dirk has a lot of hours flying the standard FSX 737, so I threw a lot of new topics at him in a very short space of time. He was making a very good approach to SFO 28L, when everything went pear shaped on short final. He and his lucky passengers took an unexpected dip into the bay...
What I learned from this experience is that after a while we take so much of what we do for granted, we operate the plane instinctively rather than think about what we're doing. We amass so much knowledge and skill, we often overlook it. It's only when you see someone try to make that jump in a one hour session that you realize how much expertise we've developed.
My expertise will be spent on cabinet making for the next few weeks...
Subscribe to:
Post Comments (Atom)


Ah - funny you posted this as I've been debating the samw question. I was thinking thin steel, but the perspex option is easier to work than steel. You could also use modelling plastic card - may work OK and be a bit easier to work with then perspex
ReplyDeleteThanks for the feedback Iain. Perspex isn't that hard to work with, you just need to know what will and won't work when machining it. I use a 180 tooth saw blade on my table saw to cut it down to size. With a forstner bit in my drill press I was able to make accurate cut outs without going all the way through. I too thought about using steel but my shop isn't set up for much metal work and the plastic is strong enough for my purposes. My worry was getting the paint to stick to the perspex but as mentioned in my post, this plastic primer I bought is amazing stuff.
ReplyDeleteI'll follow through with your advice in this. True that perspex is far more forgiving than light steel. Cheers, Iain
ReplyDeletewww.Flaps2Approach.com
You're welcome Iain - nice web site by the way! I'd never heard of Northern Flight Sim until I read your blog. Very interested to see how your TQ turns out - wish I knew about this option before handing money over to the mad Frenchman...
ReplyDeleteFlyWJP
Can you please tell me what modules you are using - are they from Flight deck Solutions or CP Flight?
ReplyDeleteIs the rudder trim module fully functional? Thanks, Iain
Iain,
ReplyDeletePer my email to you (but happy to answer in public!), I'm using CP Flight for all my console units. You plug them in and they work - how cool is that? The audio panels are bit of BS, but they look better than big gaps in the rack. And they light up too! Will fake it until I make it...
FlyWJP