Who could resist reading a posting with such a great title? You, my fellow anoraks.
My day job is seriously interfering with my hobby. For example, I'm off to Europe again this week - somewhat of an unscheduled but necessary trip. Thus progress has been slow and mainly in the planning area.
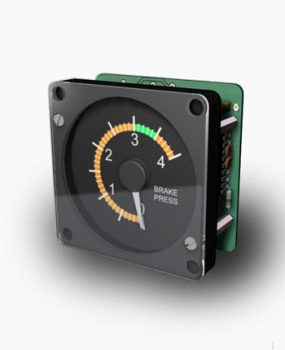
Given the lead time for their gear, I've ordered up another Flight Illusion digital clock for the first officer (I wasn't going to do it but couldn't resist - an empty space in the MIP is a hole in my soul) and a brake pressure gauge (critical for landing and plugging another hole in the MIP).
Also noticed their new radio magnetic indicator with DME. Looks very nice and have enquired if it will fit the MIP or if customization is required:
Also asked if there are any plans for a combined airspeed and altitude gauge. If so, I'll be selling off the separate current ones I already have.
What else? Had a visitor over last Saturday who wanted to fly the sim. I ran Ken through some basics (he has never flown a 737 or a sim like it) and he got it off the ground no problem. Switched to the autopilot while climbing out of KSFO. All going well. Then while we were looking down at the PFD, all hell broke loose! Clearly something had gone wrong and the autopilot couldn't control the flight. I disengaged it while trying to figure out what was wrong. Ken did a remarkable job for a rookie, getting back to straight and level flight after a couple of wild pitches up and down and some rolls that would have the passengers barfing in a heartbeat.
Checking out the TQ, the trim indicator was pegged out at full nose up.... I thought I'd fixed this problem with some SIOC script changes but clearly not. We didn't have time to reset and try again so will need to spend more time trying to debug this damn piece of junk! The real annoying thing is that when Ken expressed an interest in having a go, I ran through a test flight before he came over and everything worked flawlessly. Murphy's law I guess.
And talking of Murphy, check this video out. Wonder if the captain is still flying for the airforce? Fine job of setting that sucker down though...
Monday, July 23, 2012
Tuesday, June 26, 2012
Here we go again
Back from my latest tour of Europe. Waiting for me was a nice big box of goodies from our friends at Fly Engravity. Yes, the first officer side of the MIP with all the switches and what not have arrived. Time to break everything down and start afresh.
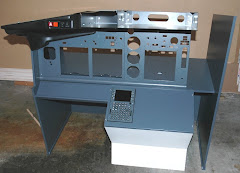
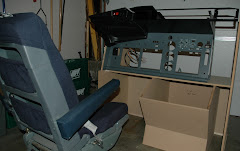
This weekend I'll get a start on pulling the sim apart, hopefully for the last time. I need to replace the MIP stand with a full width model. The raised base will also go and will be replaced by another that is also full width. I'll use 2" x 6" lumber this time to give me more to play with in terms of the control column base. I won't be adding a first office yoke or pedals now but would like to have the option for this in the future. I'll also come up with a more modular design that will make it easier to maintain the entire rig. For example, screw down floor panels rather than carpet.
Incidentally, I was cruising my usual sites for information and saw that Rudy was selling his control columns, yokes et al. For a moment I thought maybe I could save some time by buying his. Sadly though, it sold in no time. I've always admired Rudy's work and have looked at all of his build photos, especially his control columns. Puzzled as to why he was selling, I dropped him a line. Answer: Looking for a more realistic set up, self centering with the possibility of motorization. As always, he continues to inspire me.
My new design will also allow for the addition of a shell. It will be constructed of at least 4 separate parts, 2 sides, the window frames and a roof. If I ever get around to building the overhead, it will be an integral part of the roof design.
For now though I just want to get my sim room emptied so I can paint the walls, replace the carpet with a hardwood floor, gut the closet to put my desk in there instead, run wires for the projectors and build the wrap around screen. Doubt I'll have much to show for a while but when I do, I'll post the photos.
As you'll notice from the panel on the right, my new desired end state has changed to the full size cockpit. And to close, a photo I took over Greenland last week of a huge glacier. Sorry the window was so dirty - United, are you reading this?
Ps. While in Germany I visited the Sinsheim Technik museum with my buddy Bernd and his 2 kids. Got to clamber around inside a Concorde and a Tuploev TU-144. How cool is that?
This weekend I'll get a start on pulling the sim apart, hopefully for the last time. I need to replace the MIP stand with a full width model. The raised base will also go and will be replaced by another that is also full width. I'll use 2" x 6" lumber this time to give me more to play with in terms of the control column base. I won't be adding a first office yoke or pedals now but would like to have the option for this in the future. I'll also come up with a more modular design that will make it easier to maintain the entire rig. For example, screw down floor panels rather than carpet.
Incidentally, I was cruising my usual sites for information and saw that Rudy was selling his control columns, yokes et al. For a moment I thought maybe I could save some time by buying his. Sadly though, it sold in no time. I've always admired Rudy's work and have looked at all of his build photos, especially his control columns. Puzzled as to why he was selling, I dropped him a line. Answer: Looking for a more realistic set up, self centering with the possibility of motorization. As always, he continues to inspire me.
My new design will also allow for the addition of a shell. It will be constructed of at least 4 separate parts, 2 sides, the window frames and a roof. If I ever get around to building the overhead, it will be an integral part of the roof design.
For now though I just want to get my sim room emptied so I can paint the walls, replace the carpet with a hardwood floor, gut the closet to put my desk in there instead, run wires for the projectors and build the wrap around screen. Doubt I'll have much to show for a while but when I do, I'll post the photos.
As you'll notice from the panel on the right, my new desired end state has changed to the full size cockpit. And to close, a photo I took over Greenland last week of a huge glacier. Sorry the window was so dirty - United, are you reading this?
Ps. While in Germany I visited the Sinsheim Technik museum with my buddy Bernd and his 2 kids. Got to clamber around inside a Concorde and a Tuploev TU-144. How cool is that?
Monday, May 21, 2012
Off topic but somewhat cool
Yesterday we had an almost total solar eclipse in northern California. I was in the yard working on the irrigation system (irritation system as I prefer to call it) when I noticed that the sunlight was getting dimmer. I set up a simple pin hole camera to show the missus what was going on.
What I didn't expect was that the dog would get freaked out by what was happening. She jumped in my lap and by a fortunate coincidence, my spectacles were creating a better image on the white board than the pin hole camera was! Photo courtesy of the missus - shadow courtesy of the dog:
And for those of you who want to try this at home, note I have my back turned away from the sun, I'm not looking directly into it...
What I didn't expect was that the dog would get freaked out by what was happening. She jumped in my lap and by a fortunate coincidence, my spectacles were creating a better image on the white board than the pin hole camera was! Photo courtesy of the missus - shadow courtesy of the dog:
And for those of you who want to try this at home, note I have my back turned away from the sun, I'm not looking directly into it...
Sunday, May 20, 2012
Good news - I'm not going bonkers. Bad news - I'm on the brink...
Got back from a business trip to find a parcel from CPFlight. It's the returned MIP board which according to Paolo, is working just fine. Since I made the decision to go full size on the cockpit (more on this later) and since Paolo has been very patient with me, I ordered a second EFIS for the first officer's side. Both board and unit arrived in good shape.
A quick test Friday. I powered both the MCP and MIP board separateley, plugged the board into the MCP and dual EFIS units, then ran the CPFlight test program. Result? THE BOARD IS NOT WORKING! See how the glare shield lights are grayed out? Ah ha! Vindicated - I'm not going bonkers. I'm right and Paolo is wrong.
After a night of mulling it over I thought, what if it's because I didn't have anything wired up to the board? Maybe it's the old EFIS unit playing up, since everything gets daisy chained through it?
Today I ran 2 more tests. The first I simply wired up the six pack to the MIP board, plugged the FO EFIS into it and ran the MCP to the EFIS. Here are the results:
The darned thing is working! Must be the captain's side EFIS. Second test, joined the EFIS units, ran the MIP board to the captains side, FO plugged into the MCP. It's working again!
A quick test Friday. I powered both the MCP and MIP board separateley, plugged the board into the MCP and dual EFIS units, then ran the CPFlight test program. Result? THE BOARD IS NOT WORKING! See how the glare shield lights are grayed out? Ah ha! Vindicated - I'm not going bonkers. I'm right and Paolo is wrong.
Today I ran 2 more tests. The first I simply wired up the six pack to the MIP board, plugged the FO EFIS into it and ran the MCP to the EFIS. Here are the results:
The darned thing is working! Must be the captain's side EFIS. Second test, joined the EFIS units, ran the MIP board to the captains side, FO plugged into the MCP. It's working again!
Ok, I'll now unplug the six pack and see what happens. Same results! It's working! What are the variables here that meant it didn't work before but now it does? Is it the power up sequence? In the next test I powered up the MCP before the MIP board. Same result - all checks out ok...
Now do you see why I'm on the brink of going bonkers? Paolo is right and I'm wrong... I'm going to design an interface board to make it easier to swap out the MIP board in the future. Wiring and un-wiring every connection in the MIP is a pain in the rear - anything I can do to simplify will be time well spent. I fear we will see more problems with it down the road.
Other developments for you. As you may recall, last year I purchased a more realistic yoke to replace the CH Products mash up I made. First order of business was to find a new tube that would fit the yoke neck. The local home improvement stores didn't have anything that would work so I started asking mates for any tubing they might have, including Bob up in Oregon, a fine home brew maker and a stunt double for the guy on the Burt's Bees packaging. Nothing doing.
Quite by chance I happened on a metal supply company less than a mile from the house. In and out in 5 minutes with a piece of 3 inch metal tube cut to length. The neck fits perfectly.
I plan to redo the yoke damping mechanism and will experiment with a design I found here. More details to follow.
What else? Order the first officer panel,electronics and what nots from Fly Engravity this week. I'll be heading out again back end of next week on a long trip to Europe, hope to find the package on the doorstep when I get back. Means redoing the MIP stand etc (think I'll use plywood this time) but I figured it best to get the exact MIP dimensions before making the outer shell - my winter project is already planned.
Thursday, May 10, 2012
What the heck!
As you know, I've been having problems with my CPFlight MIP board. I've been in extensive email exchange with the guys in Italy to figure out was going wrong. How extensive? 44 emails (including requested photos of my set up) back and forth trying to figure it out! Admittedly I didn't help the process by misnaming one of the components in my "I'm sure I'm right" descriptions. I learned something from that...
Bottom line, I shipped the board back a week ago so Paolo could take a look at it. From my end the thing had gone none functional since applying power directly to the board. I was convinced it was blown. Paolo plugs it in and.... it works flawlessly! It's on its way back to me where I will (for the 3rd time) reconnect all the wires and try again. Or maybe not. First I will video document me connecting the thing to the MCP, the 6 pack, EFIS and 1 radio. Then if it works - hurrah! If not, what the heck is going on! Maybe the problem lies with the MCP - we shall see.
Received 2 bits of feedback this last week on the blog. First was a really nice email from Tom, a somewhat local anorak. He took the time out to give an assessment of my blog and writing style. I'm thrilled to report he nailed in his description the kind of tone I'm trying to get across. He also briefed me on his build plans. If I can help out, happy to do so.
Also received a comment from Shweta asking for more information... happy to oblige although I'm not entirely sure what kind of information you're looking for.
There's a small window of opportunity this weekend for me to work on the build. Then I'm on the road again for more or less the next 6 weeks. May be a while before I post anything of significance but of course, will keep you all informed of progress.
Bottom line, I shipped the board back a week ago so Paolo could take a look at it. From my end the thing had gone none functional since applying power directly to the board. I was convinced it was blown. Paolo plugs it in and.... it works flawlessly! It's on its way back to me where I will (for the 3rd time) reconnect all the wires and try again. Or maybe not. First I will video document me connecting the thing to the MCP, the 6 pack, EFIS and 1 radio. Then if it works - hurrah! If not, what the heck is going on! Maybe the problem lies with the MCP - we shall see.
Received 2 bits of feedback this last week on the blog. First was a really nice email from Tom, a somewhat local anorak. He took the time out to give an assessment of my blog and writing style. I'm thrilled to report he nailed in his description the kind of tone I'm trying to get across. He also briefed me on his build plans. If I can help out, happy to do so.
Also received a comment from Shweta asking for more information... happy to oblige although I'm not entirely sure what kind of information you're looking for.
There's a small window of opportunity this weekend for me to work on the build. Then I'm on the road again for more or less the next 6 weeks. May be a while before I post anything of significance but of course, will keep you all informed of progress.
Wednesday, April 25, 2012
Visitors and a try out of FS Instant Approach
We had a visitors this weekend, Gianluca and Linda. Hard to believe it's been a year since they were last up this way! This time around I had Gianluca do the flying (to be honest I had too much wine at dinner to be much use myself). He did an excellent job considering my sim was new to him and that he didn't have the luxury of a working MIP (the CPFlight MIP board blew out about a week ago - more on this later).
After a smooth landing in San Francisco, we tried out a utility I recently purchased call FS Instant Approach. With it you can set the plane up for any airport/runway in your simulator, specifying how far out you want to be, weather, visibility, speed etc:
We noticed a bit of a hiccup - when you switch to FSX and take it out of pause, the throttles firewalled! A brief pull back on the levers and normal behavior was observed. This could be set up dependent. When I tested it again today for these pictures, I didn't have my TQ or Prosim turned on and the engines were running under the command of the A/T.
The pause feature is quite handy though. Since the utility has no idea of what other software you're running, it gives you time to re-program your FMC and get the rest of you aircraft squared away for approach. With this done, come out of pause and in my case, adjust your thrust settings.
In this example I set visibility to 2 miles and as you can see, created a typical San Francisco summers day:
I flew the approach and caught sight of the runway in time to make my go/no go decision:
One feature of the utility is that you can view your flight map "in Google maps". A bit of a con really because the software uses the vendors website to show the flight path taken:
I've made a number of test flights and only 3 are available to view. Plus you can only see the flight track, would be better if you could also see the altitude and have it displayed in Google Earth rather than their half baked version of Google Maps. Some kinks to work out there boys. For $14 though, not bad at all.
Gianluca also left me with a generous gift - some projector screen material! What a gentleman!
After a smooth landing in San Francisco, we tried out a utility I recently purchased call FS Instant Approach. With it you can set the plane up for any airport/runway in your simulator, specifying how far out you want to be, weather, visibility, speed etc:
We noticed a bit of a hiccup - when you switch to FSX and take it out of pause, the throttles firewalled! A brief pull back on the levers and normal behavior was observed. This could be set up dependent. When I tested it again today for these pictures, I didn't have my TQ or Prosim turned on and the engines were running under the command of the A/T.
The pause feature is quite handy though. Since the utility has no idea of what other software you're running, it gives you time to re-program your FMC and get the rest of you aircraft squared away for approach. With this done, come out of pause and in my case, adjust your thrust settings.
In this example I set visibility to 2 miles and as you can see, created a typical San Francisco summers day:
I flew the approach and caught sight of the runway in time to make my go/no go decision:
One feature of the utility is that you can view your flight map "in Google maps". A bit of a con really because the software uses the vendors website to show the flight path taken:
I've made a number of test flights and only 3 are available to view. Plus you can only see the flight track, would be better if you could also see the altitude and have it displayed in Google Earth rather than their half baked version of Google Maps. Some kinks to work out there boys. For $14 though, not bad at all.
Gianluca also left me with a generous gift - some projector screen material! What a gentleman!
Tuesday, April 10, 2012
Visuals part 3 (end....for now)
Well I've gotten about as far as I can with wrinkly paper and a version of Warpalizer that doesn't save its configuration. I purchased it today but it requires a "dongle" (something that plugs into an otherwise usable USB port) that verifies the software as being legit and not some knock off. It's being shipped from Norway so it will be a week or so before I can get Warpalizer up and running properly.
"What is Warpalizer?", I hear you say. It's software that bends (or warps) the projected image on a curved screen so that to the observer, everything is the same focal point and is distortion free. Without it your 3 projector set up looks funky as all get up. Now the challenge with the evaluation version is that it doesn't allow you to save your settings and sometimes a change in focus in windows (ie. you switch to FSX) will cause the settings you made to disappear. This photo gives you an idea of how Warpalizer works:
You use the edit function to make all of the rows appear to be equally spaced and in proportion to each other. I could only get this in so so shape since the butcher paper screen sags and bunches up unevenly across the projection field. Sometimes I was staring at the image not sure if it was the paper or the warping factor that was out of whack (it was almost always the paper). You can also set the edge blending, where the 2 project beams intersect (on box 11 and 22).
Per my opening sentence of this post, I've tested about as much as I can with this prototype rig. Plus the wife wants to park the car in the garage so tonight I pulled it all down.
Just for giggles, I took the semi circle base of the frame into the sim room to see if it would fit. Oh my it's tight! It works though. I can't wait to re-arrange the room, get the projectors mounted on the ceiling and install some kind of screen. Plywood or a screen hanging down from the ceiling? Will need to think about this one.
What else? Happy to report with all projectors running at 1280 x 800, FSX was managing 30 frames per second while on the ground in SFO. Haven't tried it on an "add on scenery" airport but so far, performance doesn't look like an issue.
"What is Warpalizer?", I hear you say. It's software that bends (or warps) the projected image on a curved screen so that to the observer, everything is the same focal point and is distortion free. Without it your 3 projector set up looks funky as all get up. Now the challenge with the evaluation version is that it doesn't allow you to save your settings and sometimes a change in focus in windows (ie. you switch to FSX) will cause the settings you made to disappear. This photo gives you an idea of how Warpalizer works:
You use the edit function to make all of the rows appear to be equally spaced and in proportion to each other. I could only get this in so so shape since the butcher paper screen sags and bunches up unevenly across the projection field. Sometimes I was staring at the image not sure if it was the paper or the warping factor that was out of whack (it was almost always the paper). You can also set the edge blending, where the 2 project beams intersect (on box 11 and 22).
Per my opening sentence of this post, I've tested about as much as I can with this prototype rig. Plus the wife wants to park the car in the garage so tonight I pulled it all down.
Just for giggles, I took the semi circle base of the frame into the sim room to see if it would fit. Oh my it's tight! It works though. I can't wait to re-arrange the room, get the projectors mounted on the ceiling and install some kind of screen. Plywood or a screen hanging down from the ceiling? Will need to think about this one.
What else? Happy to report with all projectors running at 1280 x 800, FSX was managing 30 frames per second while on the ground in SFO. Haven't tried it on an "add on scenery" airport but so far, performance doesn't look like an issue.
Subscribe to:
Posts (Atom)