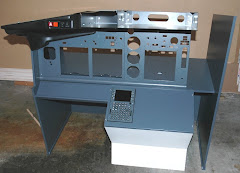
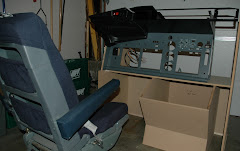
Ok, in my last post I said I would have an update by mid August. It's the end of the month - it just snuck up on me. So where are we? Well the drywall is in and the tile guy is there today working on the bathroom. The landscaping crew is in full swing and the carpenter is putting some doors and trim in. I've been painting. None of this is related to the sim of course...
No progress to report. I did try the 150n struts in the yoke and found that it still wasn't offering up enough resistance to stop the whole column from flapping around. Back to the drawing board there - will try changing the fulcrum point to see if that does the trick. I'm taking some time off work next week and we're heading out of town - will take the yoke assembly with me to experiment. Or maybe I'll set it up on the passenger side of the car and will amaze people with my right hand seat driving skills, while the wife crouches down in the left hand slot, working the pedals.
September is the month I should see my throttle quadrant from Revolution Simproducts. Waiting to hear back from them in terms of a delivery date.
My mind though has been pre-occupied with the external visuals. I'm thinking of going for a set up very similar to the one Ivar Hestnes built. You really should check out the link, it looks awesome! Best I can tell from the information gleaned here, I'll need to upgrade the main computer I'm using. Thinking of building my own, rather than buying a pre-built. This should be interesting...
All for now.
Monday, August 30, 2010

Saturday, July 31, 2010
Treading water while waiting for new pedals...
Since I'm planning on attending the geek fest in Lelystad later this year, I decided to take Revolution Simproducts up on their offer for a pedal kit (sorry, none left). While doing my usual poke around of what other people are up to, I noticed these excellent video guides from Ian on how to put the pedals together. Now the good news for my friend Bernd in Germany is that I have a spare set of CH products pedals for him, and possible a yoke too, if I ever get my home brew one finished.
Speaking of which, I ordered up some heftier gas springs for the yoke. The 100 Newton ones in there now aren't strong enough to keep the top heavy yoke from flopping forward or back. Let's see if the 150 ones work, if not I'll double them up with the ones already installed.
The wiring on the house remodel I'm working on is all but done, meaning I can spend time on the sim again in the very near future. Next weekend we're out of town (finally a break) so expect another update mid August.
Speaking of which, I ordered up some heftier gas springs for the yoke. The 100 Newton ones in there now aren't strong enough to keep the top heavy yoke from flopping forward or back. Let's see if the 150 ones work, if not I'll double them up with the ones already installed.
The wiring on the house remodel I'm working on is all but done, meaning I can spend time on the sim again in the very near future. Next weekend we're out of town (finally a break) so expect another update mid August.
Monday, June 28, 2010
Ok, made my mind up...
...I ordered the motorized throttle today from Revolution Simproducts. Oh boy. Next 10 to 12 weeks will seem like forever.
Friday, June 25, 2010
Still here (sort of)
Sorry folks, not much action to report. Got back from a trip to Europe a week or so back and today I'm getting on the plane back there... This and the house remodel (I can hear the contractor banging away as I write this) has resulted in very little time for the sim.
What I did do though was more work on the yoke (mind you, that Ace yoke is starting to look tempting....). Managed to break one of the CH products potentiometers in the process, since I wasn't paying attention to the strain I was putting on the thing while coupling it up to the yoke handle. Snapped the PCB in two in the process. Happily, CH products sells and ships parts. I ordered 2 more (hey I might break it again!) and they arrived today. On my return from Europe I'll take another crack at it.
On my last trip I contacted Revolution Simproducts to see if I could stop by to see the motorized throttle (I had Euros burning a hole in my pocket...). Eren got right back to me and said it wouldn't be a problem. Sadly, even though I was in France, he was too far away for me to get there and still catch my flight home. Maybe next time. I need to make my mind up - keep going with my home made yoke and buy the throttle, or buy the yoke now and the throttle later?
Also while away, Gianluca got in touch. It was really pleasant to get some direct feedback on the blog, my progress and also to note the similarities in our builds.
All for now - my real plane beckons.
What I did do though was more work on the yoke (mind you, that Ace yoke is starting to look tempting....). Managed to break one of the CH products potentiometers in the process, since I wasn't paying attention to the strain I was putting on the thing while coupling it up to the yoke handle. Snapped the PCB in two in the process. Happily, CH products sells and ships parts. I ordered 2 more (hey I might break it again!) and they arrived today. On my return from Europe I'll take another crack at it.
On my last trip I contacted Revolution Simproducts to see if I could stop by to see the motorized throttle (I had Euros burning a hole in my pocket...). Eren got right back to me and said it wouldn't be a problem. Sadly, even though I was in France, he was too far away for me to get there and still catch my flight home. Maybe next time. I need to make my mind up - keep going with my home made yoke and buy the throttle, or buy the yoke now and the throttle later?
Also while away, Gianluca got in touch. It was really pleasant to get some direct feedback on the blog, my progress and also to note the similarities in our builds.
All for now - my real plane beckons.
Monday, May 10, 2010
A quick word
Dear Anoraks,
I picked up a comment from Mike this weekend, apparently he is building a captain only rig too. Problem was, I couldn't figure out his email address to reply to. Which got me thinking, how can you reach out to me? I checked out Gmail to find that some wag has already stolen my FlyWJP handle, so here's the address you can use going forward (it's also in my updated profile): wjpairmail@gmail.com
What else? Slow to no progress on the sim due to other commitments. Trying to focus on the yoke rebuild, will post an update when I've figured out the mechanism for controlling roll and pitch.
Also picked up a new follower from New Zealand, Ruscool. Not only can they repair your Mitsubishi refrigerated container controllers (eh?), they also knock out parts for flight simulators. Those rotary encoder knobs look cool and I'm sure a set has my name on them...
I picked up a comment from Mike this weekend, apparently he is building a captain only rig too. Problem was, I couldn't figure out his email address to reply to. Which got me thinking, how can you reach out to me? I checked out Gmail to find that some wag has already stolen my FlyWJP handle, so here's the address you can use going forward (it's also in my updated profile): wjpairmail@gmail.com
What else? Slow to no progress on the sim due to other commitments. Trying to focus on the yoke rebuild, will post an update when I've figured out the mechanism for controlling roll and pitch.
Also picked up a new follower from New Zealand, Ruscool. Not only can they repair your Mitsubishi refrigerated container controllers (eh?), they also knock out parts for flight simulators. Those rotary encoder knobs look cool and I'm sure a set has my name on them...
Sunday, April 25, 2010
Much better, less grumpy
After a spot of RTFM with the Flight Illusion manual, I learned that the chrono, attitude indicator and altimeter come with a preset device ID. The others are generic gauges and have the same ID until you change it (but of course! How did I miss that?). Since the flap, yaw and airspeed indicators are generic, you need to hook them up one at a time and let the config program find them. From there you can reset the device ID to ensure that they are all unique.
Bottom line, all of the gauges now function. And they do so flawlessly. Without any further set up or calibration, first tests are showing very promising. And here's how it all looks:

Bottom line, all of the gauges now function. And they do so flawlessly. Without any further set up or calibration, first tests are showing very promising. And here's how it all looks:

..with the exception of the engine screen which I don't have hooked up to a computer at the moment. What a delight to see at a glance the current flap settings and to see the indicator move at the speed of flap extension! Outstanding! Ah it's the little things that bring such joy to Anoroks such as your truly.
Alrighty then, must press on with the yoke and platform, this weekend's work has added fresh vigor.
Saturday, April 24, 2010
I can see clearly now the ash clouds are gone
What a difference a couple of days makes? Sister and kids got home, Flight Illusions gauges arrived!
First check out of gauges was very positive. With everything plugged into the interface board, it all powered up and each unit went through its reset mode. The chronometer looks fantastic and functions well. The build quality of each unit is... fair to good. Sorry, but it's short of excellent. Here are my detailed observations (and it's not all down to Flight Illusions):


First check out of gauges was very positive. With everything plugged into the interface board, it all powered up and each unit went through its reset mode. The chronometer looks fantastic and functions well. The build quality of each unit is... fair to good. Sorry, but it's short of excellent. Here are my detailed observations (and it's not all down to Flight Illusions):
- When you look at the dimension specs on Flight Illusions web site, most of the depths are incorrectly stated. Not that it really matters if you're mounting things in an open backed frame but all the same.. If you can't publish the correct specs, how accurate will you be with the manufacture of the product. Case in point, the attitude indicator has a true depth of 50mm (not including the bezel) but a reported depth of 27mm
- The mounting holes are set 63mm apart on the big gauges. On the Engravity MIP, they're set at 79mm. No problem you think, I'll drill and tap new holes on the gauge. Not so fast, the gauge itself is about 83mm wide, leaving very little material to drill and tap into. Looking at forums, Engravity claims their hole spacing is per a real cockpit spec. In Flight Illusion's defense, they can't make a product that will fit any panel but you think there would be a bit more cooperation between the 2 biggest suppliers of Boeing simulator parts. As it turns out, the only 2 gauges that fit the predrilled holes in the MIP are the flap and yaw indicators
- The gauges arrived with no mounting screws. A review of forums indicates that Flight Illusions suggest you use "Parker" or self tapping screws. Into plastic? Scary prospect when you run the risk of ruining a gauge that can cost up to €278,30. Saying that, drilling and tapping isn't exactly worry free:
- For the gauges where the holes don't line up, I'll be using a strong double sided tape from 3M and will hope it's enough to keep the gear in place
- The yaw gauge was misdrilled in one corner. They cut it too close to the edge of the plastic case and the bolt is hanging out the side. Fortunately the other three bolts are holding it together
- Most of the plexi glass covers on the gauges were either dusty or needed cleaning. I used a can of compressed air to blow the dust out
- The attitude indicator is the most impressive piece of engineering. It has its flaws though. Instead of a slice off a sphere, they've used a piece of card bent over and stuck into a plastic holder, which you can see top and bottom (white plastic):
It might be a visual distraction or maybe I'm just being super picky
There were smudge marks on the printed card (ok, I am being picky, but try using latex gloves when you put these things together guys!):


Tried to mount the attitude indicator (tricky when you have to reach around over the top of the glareshield) and it wouldn't fit! Cause? Faulty cut out in the Engravity MIP panel. See the ridge in the bottom left at about 7 o'clock? We need to grind that out:

Gee what's with all the masking? Well, I don't want aluminum dust flying off all over the place gumming up the works and potentially shorting out expensive electronics:

Take note Anoraks, make sure all of the holes are ready to go before you assemble the MIP. You'll save yourself a lot of monkeying around later. With the hole smoothed out, I took a final look at the gauge before mounting it and decided that light will leak in from outside, ruining the effect. So a bit of gaffer tape applied carefully around the outside should make it light tight. Note the red double sided adhesive tape in the corners:

Now all of the gauges are installed (well where's the picture? Later my friends, I'll have another post for you this weekend), how does it look? It looks fantastic! Instead of the gaping holes in the MIP, it's looking very complete. However, all is not well.
Installed the Flight Illusions software and it recognizes the altimeter, chrono and attitude indicator. The test program ran them through their paces and they look stunning. It can't find the flaps, yaw or airspeed indicators. More analysis required and right now, the dog wants to go for a walk.
More later.
Subscribe to:
Posts (Atom)