Monday, December 29, 2014

I'm still here, no really, I mean it this time

Time to dust off the blog. Sim news later in this post, first though check these photos out:


Taken at Cambridge airport UK, a 737 cargo plane was unloading and loading racehorses, returning from and heading back to Dublin. I was there with a buddy of mine. We had just taken off from his field in a Piper Arrow (a first for me, take off from a grass strip that is) and dropped in to Cambridge for fuel. Shortly after the 737 landed and I was able to snap these shots.

Now what makes this so remarkable is that I took these photos on December 20th. ONE YEAR AGO! 

Reason I've been so quiet, I started a new job in January 2014. Less travel but more work. A lot more work. So much so I didn't get a weekend off until March.. Plus there was the "honey do" list to complete. Remember this drawing from a prior post (as in August 2011?):
Had to complete this project before getting back to the sim. Also since the cabinets are so big they were in the way of any other progress in the workshop. Got it finished this year, a photo of the finished product for you:
And so dear reader, enough of the excuses. Back to the topic. Now where were we?

Unable to put any build time in, I have however been collecting parts. I scrapped the original LCD screens I had in the MIP and have replaced them with some brighter, LED lit units. I needed to get a second monitor for the first officer side and I wanted them both to match. Snagged a couple of these Dell 19" models:

And a couple of 10" open frame units off of eBay:

Since you can now get single video cards that can drive multiple monitors, got a new unit for the external displays:
And another for the secondary system to drive the 4 MIP displays:
Unable to test it out since a power outage in the middle of a Windows update fried the secondary system... Will need to get that fixed but what a pain Microsoft - can you write some software that will self correct in the event of an incomplete update? Looks like I'll need to do a complete OS re-install.

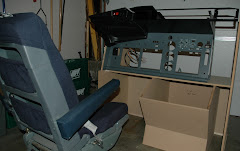
All parts from Engravity are sitting around gathering dust for the first officer side of the cockpit. The MIP cabinets will get a complete rebuild to accommodate all the extra gear. 

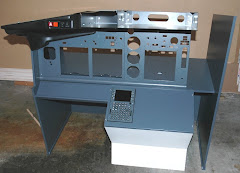
Which brings me to what I've actually built of late. A couple of years back a colleague from Germany was visiting. He took one look at the wiring mess behind the MIP and wagged a finger at me, "Germans would not be happy with such a sloppy job". Shamed to rethink my handiwork and planning ahead for a similar mess on the FO side, I came up with the following board for the MIP control card:

Why you ask? Well, I had to send the board back to CP Flight for tests (it stopped working) and un-wiring what I did have hooked up was a pain. This way if the card does fail, all of the lights and switches will be connected to the terminal blocks and not the card. Also, I don't have tiny hands nor eyes capable of reading 3 point font. The terminal blocks give me more room and an easier view of what I'm hooking up. Once the new MIP cabinets are complete, I'll rewire all of the lights and switches to this board with ribbon cable. One day Frank will be proud of me...

In bits sitting around my workshop is a partially built control column mechanism. Will get back to that in due course. And of course, the wrap around screen awaits design and build

All for now folks, wishing you a happy new year.

Monday, December 2, 2013

More anorak adventures

Worth watching the whole clip to see the anoraks at the end:

Wednesday, November 13, 2013

How to fly a real 737 with only 1 month of training

Happened upon this video today while testing out some new AV gear I was installing. From a Belgian tv show (don't worry, there are English subtitles). Follow Tom has he tries his hand at flying a real 737-800. Admit it, you've always dreamed of doing it yourself should the pilots on your flight become incapacitated


And I'll be back to my build real soon - already took delivery of the 1st officer MIP screen.

More from me in the long, dark, Californian winter months (ok, it might rain for a few days...)

Wednesday, September 4, 2013

Rim Fire

Another off topic post for you. As you may have heard there's a huge wildfire burning in California, close to Yosemite. A friend sent me a link to this video that gives you a co-pilot's view of what it looks like from a water bomber. Fascinating. Stick with it - they make the drop then avoid traffic on the way out.

Sunday, July 7, 2013

I'm Still Here

Hard to believe that it has been more than 6 months since my last post. All work on the sim has stopped due to a higher than usual business travel load. As it happens, I was at KSFO yesterday when Asiana 214 came down. You can just make out the charred top of the plane from the photo I snagged - just to the left of the American elevator

Fire extinguished by the time I got to this vantage point. Very sad day.

More soon.

Monday, December 10, 2012

To Live and Fly in LA

One of the plus sides of the Continental - United merger is that I get to fly on a lot more 737s than I used to. Last weekend I flew down to LA to meet up with friends and snagged this photo shortly after departing KSFO 1L
Destination: Gianluca's cockpit. He and Linda graciously offered me dinner and an hour or so on his sim. We've been in touch over the years and Gianluca was probably the first to contact me after reading this very blog. Checking the blog history we discovered that December 8th 2009, 3 years to the very day we were getting together, I made my first posting. I can say without hesitation, Gianluca has come along a lot further with his build than I have:
And apologies for the shaky photos folks, all I had on me was the iPhone.

He has an overhead in that he put together himself and what an impressive job!:
Especially the wiring...
Given the enormity of the task and my lack of free time, I plan on going with the SimWorld plug and play version. It really adds to the experience and I know it's only a matter of time before I breakdown and place my order. 

Now back to the flying. We decided on a quick flight from LAX to SAN then back again. The flight down was in the dark. As was I for most of the time... It has been so long since I've flown I was flubbing things left right and center. It is amazing how quickly you lose the muscle memory. Gianluca was very patient and was doing his best to be my FO, even though there was no seat or easy access on that side.

Landed at SAN ok. Came down just on the threshold, possibly a little short. No time to mess around, we switched to daylight mode, took off then flew back to LAX. 

On the way we noticed that we were low on fuel on the left tank, the center tanks and right tanks were not being consumed. While Gianluca tried to figure out what was happening there, we lost both engines about 30 miles out from the runway. I disengaged the auto pilot and hand flew the plane while my FO tried to get the motors running. No luck.

Interestingly, you shouldn't be able to start the APU with no fuel in the left tank. It started but the engines wouldn't. Not sure if it was a logic issue with the overhead or whatever - we decided to try dead sticking the plane to the planned landing on 24R at LAX. Gianluca has a super scenery package installed (sorry, I forget the name) and he wanted me to see the detail. 

We planned on lowering the gear at the very last moment so as not to introduce yet more drag. It looked like we were going to make it. Airspeed was ok and we had enough altitude to land the plane. I think I had flaps at about 10 degrees. Seconds before touchdown we were falling beneath the glideslope and the speed was bleeding off rapidly - nothing for it, drop the gear. And boy did we drop! Right into the In-N-Out burger parking lot on South Sepulveda Boulevard.


You can see from the photo above how close we were to landing safely. And the scenery package was very good - you could see the sign whip by, pretty much the way it looks in the photo. We overshot the drive through, crashed through the perimeter fence and onto the runway. All just as well, our non-virtual dinner was ready.

Many thanks to Gianluca and Linda for a lovely evening and for a reminder for me to get on with this project and fly more often than I do.

Tuesday, November 27, 2012

From the Floorboards Up

As winter closes in and my crazy travel schedule tapers off, it's time to get back to work on the sim.

As previously reported, I have most of the parts for the first officer MIP. This means redesigning the cabinet to house everything, along with the base the captain's side is currently sitting on. Before cracking on with that, I should probably focus my attention on the control column mechanism, since it will determine the height of the base. Hence the post title - lets start with the floorboards and move up from there (cue Paul Weller...).

While I'm at it, it's really time to consider how am I ever going to move this thing when finished? The new design will be more modular and will be easier to bolt together and tear down for maintenance. But first, the control column set up.

I've taken Ivar Hestnes' design as a starting point. You'll find it here. It's really quite ingenious. Especially the use of gas struts. I've failed miserably to find a strut which in its neutral position is neither compressed or expanded. My hope was to find something that would return to neutral after being pushed or pulled. Ivar gets around this by mounting regular gas struts in aluminium tubing. Very clever but I don't have access to welding equipment. And I'm too cheap to have someone weld it for me.

Which got me thinking, since even Ivar says his welded steel frame design is overkill, what if I made mine out of bolt together angle iron instead? It's cheap enough that if it doesn't work out, I can always use it as a prototype for the finished thing. Much easier to bolt and unbolt things than to weld and un-weld.

Armed with nothing more than the following tools on hand, I got to work using Ivar's dimensions:

  • A cut off saw:


  • 4" grinder

  • A Swanson speed square

  • A hacksaw (surely you don't need a photo of one of these...)
Now before I show you the work in progress result, a quick reminder about safety with power tools if you intend to have a go yourself. Wear the appropriate safety gear and know what you're doing. When using the cut off saw and grinder, there are sparks flying everywhere. I was about to set to with just my glasses on when the wife stopped me in my tracks. Out came the full protective goggles to go over my specs.

And here is where we are so far:


Standing up on its end is one of the 2 control columns (3" pipe). It stands on the (soon to be) pivoting structure made with 2 bits of 2" angle iron bolted together. The pivot arms are made of more of the same. The rest of the frame is made out of 1 1/2" angle iron. In the foreground are 2 bits of 2" angle iron that will support the "gas" struts (more on this in a minute). Here you can see the beauty of working with angle iron - the brace on the right as been moved further to the right to "dry fit" the positioning of the strut (the left has yet to be moved). All easily done with the turn of a wrench.

Some tips if you try this yourself:
  • Cut matching pieces at the same time with the bolt holes lined up together. This will result in a more square structure
  • Assemble everything on a flat surface
  • Use a speed square (or something similar) to make sure all of your angles are at 90 degrees
  • Use bolts that are smaller that the cut outs in the angle iron. I used 1/4" bolts, the holes are 3/8". This allows you to fine tune the position of everything to ensure an accurate fit
  • Use locking washers to hold everything together tight
  • Make some simple braces to add to the rigidity of the frame (see left and right on the central spar)
Not shown in the photo, I also purchased some 1 1/4" square tubing to handle the torsional forces of the main pivot point. This will simply be bolted to the frame.

More close up shots for you:
Now I know this all looks a bit vague right now. It will come together in the coming weeks and I'll share progress with you.

Back to the "gas struts" and the main gubbins of this construct. I found another cunning design from Aerosim Solutions in Australia. He uses screen door closers to pull the control columns back to neutral. To get around the fact they only operate in one direction, they have come up with a slotted disk that allows the opposing closer to "disengage" when the rotation is in the other direction. Check out this video and you'll see what I mean (skip to 3:30 if you don't want to watch the whole thing):


Much easier for to fabricate a slotted disk than welding aluminum tubing. 

As for the main pivot point, Ivar uses 2 x 1/4" steel plates! Way too much methinks. To prototype I simply cut a couple of pieces of 1/2" inch plywood, screwed them together and drilled all the holes the way Ivar had them. I may change this design to facilitate the Aerosim slotted plate design, here's what it looks like set on top of the frame with one of the 2 screen door closers:
The screen door closers are a great and inexpensive idea. I bought 2 heavy duty units from Home Depot at $10 a pop. The great thing about them is that they have an adjusting screw on them to control the rate of pull. Will they have enough pull to bring the columns back to neutral? That's the next step to discover. Stay tuned - flange bearings are on order from Amazon.

To close, the frame is lightweight - one person can easily pick it up, it's cheap, requires minimal metal working skills, allows for experimenting with placement etc. and appears to have enough strength to handle the loads we'll place on it.