Hard to fathom a year has gone by without a posting. If I still have any followers out there I'd be surprised..
A couple of updates for you. First one is good news/bad news. The good news is that I've entered semi retirement. This should give me time to work on the sim - yay! Bad news is we moved out of state to a home that doesn't currently have space for the sim, the screen, projectors etc. Here's what the build looks like right now:
Yep, it's in crates and stored in the cupboard with other unneeded items.
I still plan on working on some of the other bits and pieces and will resume blogging when I do. I already have a set of photos and notes from the dual control column build - don't want to post those until I know my design works.
Second update: received a polite email from Van Vangyver asking if I ever got the Flight Illusion issue resolved with the combined airspeed / altimeter gauge GSA-125 (see my post from October last year - "What the Heck"). I did. It took a while to get a response, was asked to send the defective unit back and a replacement was sent out. Let me say that the new one works flawlessly and is a joy to behold. My only gripe is that I was never refunded for the cost of shipping the duff unit back to the Netherlands from the US...
Despite this I do owe it to Flight Illusion to share with you that they did eventually make things right. And thank you to Van Vangyver for reminding me. More of him here: https://www.facebook.com/groups/628896667180635/
During a recent pilgrimage to Boeing HQ, took the factory tour where sadly photographs are forbidden. I did though get a chance to see a Dreamlifter takeoff in the rain, video right here:
They use the Dreamlifters (fleet of 4) to bring the various parts of the 787 (think fuselage, wings etc.) to Everett for final assembly and test. Very impressive. Turn your speakers to 11 for full effect.
Update as of 12 December 2016 - Flight Illusion shipped me a replacement GSA-125 some time ago and I'm happy to report it works beautifully.
Back again.
Work events have kept me away from the build but that has not stopped me buying parts and longing for the day when I can have a clean run at the sim.
First up, I ordered a couple of more realistic standby gauges from Flight Illusions, to replace the separate air speed and altitude gauges that were in there (anyone want to buy them?)
The GSA-125 combined airspeed and altitude indicator:
And the GSA-RMI-B:
Both for the princely sum of 1014 Euro (not cheap). Order was placed June 10th and a delivery window of 3 to 4 weeks was given. Well I know how Flight Illusions works, I doubted I was going to get it them that quickly.
Almost 7 weeks later, on 27th of July I contacted Flight Illusions to see what the next delivery window would be. I was promised the following week.
Four weeks later, I checked in again - still no sign of delivery. On 22nd of August I was told the missing part was in, "expect delivery next week".
30th of August received an email advising of "issues with our standard courier". To be fair to Flight Illusions, when they resolved the issue, they expressed the delivery to me.
9th of September, the gauges arrived. And they look stunning! They really have done a fantastic job on these units. Except...
I noticed some excess glue on the glass of the RMI-B. Also, the GSA-125 refused to cooperate after assigning a new ID to the unit (as per the instructions provided).
Contacted Flight Illusions on September 13th asking for advice. No response.
Contacted Flight Illusions on September 20th expressing my frustration. No response.
October 3rd, still nothing. I don't know what's going on with the Flight Illusion folk but until they get their act together I would advise buyer beware. What the heck Mark?
Unlike my experience with the good folk at CPFlight. Given the favorable dollar/Euro exchange rate and a recent bonus check burning a hole in my pocket, I decided to spring for the forward and aft overhead panels. Ordered them on August 24th, was advised that the units would ship week of September 7th, received the packages on September 14th.
They are beautiful! And very sturdy. I opted for the overhead panel covers and the combined heft of panel and cover is impressive. I'll need to have a sturdy frame to support the weight.
Plugged them in, made a simple configuration change in ProSim and everything fired up perfectly. I cannot think of a bigger contrast between 2 vendors. Claudio and Paolo have done a fantastic job with the overhead, plus they have great customer service. Laura from CPFlight kept me up to date with the build and ship dates, they really are the gold standard of the sim building world. Now if they would only build a motorized TQ, I will junk the POS I purchased from Revolution Simproducts and will buy theirs instead.
What else? Well the twin yoke build is still sitting in the workshop in pieces. I got it to a point where both of the control columns and yokes were mounted, only to discover that the heavy duty screen door closers don't have enough strength to pull the assembly into place. Next attempt I'll take out the dampers I have in the current control column and will try those.
Also (for reasons even I can't explain) I got obsessed with dropping in an intercom. No idea why - if I ever finish the build I can't imagine anyone sitting in the right hand seat with me. Nevertheless I sprung for a couple of Ruscool units:
Getting ready to complete the mechanical work on the control columns and the obvious problem slowing me down is I only have 1 control column. And it is one of my own design with a replica yoke from Routech.
Thinking of the cost of a first officer yoke, shipping from Europe and the associated metal work, I figured it would be cheaper to buy a real one. Over the Christmas break I found a beauty on eBay but was outbid ($676 for a control column and yoke? Madness). In the New Year I spotted another that looked a little tatty but good enough for my purposes. I was the only bidder and snagged the devil for $500. And here it is:
Once it is all hooked up I'll strip down the old paint and get it in the same shape as the captain's side. Before taking it all apart I set it up in the test frame I've been working on to see if the control arms will pull the weight of the column back to center. It does. Won't know for sure if it has enough umph until I get both in situ but for now I'm happy with the result.
Inspecting the column there's the obvious problem of the pivot point. Looks like the bees knees but won't work with my simple design. Take a look at the business end to see what I mean:
The "torque paddle" (if that is its name) must fit into the cross-member that connects to the captain's side. Instead of going industrial strength, I'm going to be using bevel gears and 1/4 inch steel rods. Bottom line, the green bit has to come off.
I wanted to do it in such a way that wouldn't damage or deform the control column. For this reason I couldn't simply cut it off. Instead I removed the paddle then drilled out the 8 aluminum rivets (yes 8 - they build these things to last) that holds the piece to the bottom of the column:
Even with all the rivets out I had to "persuade" the cast aluminum piece off with a hammer. Taking it all apart I was surprised to discover the vintage of the kit. Check this out - the thing is almost as old as I am:
Which means this rig probably came out of a 727 and not a 737, since the first 737 didn't fly until 1967. No matter to me. Very curious though as to the airplane it came off of, where it flew and when it stopped flying. It will get to fly again, albeit virtually...
And here is the dis-assembly complete:
The mustard looking shaft twists as you turn the yoke. I'll keep the upper assembly since it works fine. The trick will be attaching this bevel gear to the bottom of the shaft and aligning it with the cross connector to the captain's side:
Good news is the aluminum shroud that fits in the floor is in great condition. I can use it as a model for one I'll make (probably out of fiberglass) for the other side. It looks like it has the 10 degree forward tilt on it - interesting:
Alrighty then, Christmas and New Year out of the way, back to work.
I've been rethinking the design of the control column mechanism, specifically the self centering . It's overly complicated for something that it is relatively straightforward. Taking cues from what others have done, I'm now experimenting with a simple "pull me, push you" approach.
First step was to saw off the end of the screen door closing mechanism and to put a thread on the rod:
The thread allows ease of adjustment to get the control column center just where I want it. Next I made a simple bracket out of HDPE (High-density polyethylene, the stuff quality chopping boards are made of) to anchor the other end of the closer to the frame. HDPE machines very easily on my table saw and offers up a low friction surface:
With the closer attached to the swinging arm I tested the resistance. Feels about right but I won't know until I have it loaded with the control columns, yokes etc. The idea of this design is that when the arm swings towards the closer, the rod passes through the opening in the swing arm. When it goes in the other direction, the end of the rod engages and pulls the arm back to center:
I'll make up an HDPE bracket for where the closer rod ends meets the swing arm. At this point just testing the concept. So far so good. Next I'll mount the control columns and yoke for a fuller test.
Time to dust off the blog. Sim news later in this post, first though check these photos out:
Taken at Cambridge airport UK, a 737 cargo plane was unloading and loading racehorses, returning from and heading back to Dublin. I was there with a buddy of mine. We had just taken off from his field in a Piper Arrow (a first for me, take off from a grass strip that is) and dropped in to Cambridge for fuel. Shortly after the 737 landed and I was able to snap these shots.
Now what makes this so remarkable is that I took these photos on December 20th. ONE YEAR AGO!
Reason I've been so quiet, I started a new job in January 2014. Less travel but more work. A lot more work. So much so I didn't get a weekend off until March.. Plus there was the "honey do" list to complete. Remember this drawing from a prior post (as in August 2011?):
Had to complete this project before getting back to the sim. Also since the cabinets are so big they were in the way of any other progress in the workshop. Got it finished this year, a photo of the finished product for you:
And so dear reader, enough of the excuses. Back to the topic. Now where were we?
Unable to put any build time in, I have however been collecting parts. I scrapped the original LCD screens I had in the MIP and have replaced them with some brighter, LED lit units. I needed to get a second monitor for the first officer side and I wanted them both to match. Snagged a couple of these Dell 19" models:
And a couple of 10" open frame units off of eBay:
Since you can now get single video cards that can drive multiple monitors, got a new unit for the external displays:
And another for the secondary system to drive the 4 MIP displays:
Unable to test it out since a power outage in the middle of a Windows update fried the secondary system... Will need to get that fixed but what a pain Microsoft - can you write some software that will self correct in the event of an incomplete update? Looks like I'll need to do a complete OS re-install.
All parts from Engravity are sitting around gathering dust for the first officer side of the cockpit. The MIP cabinets will get a complete rebuild to accommodate all the extra gear.
Which brings me to what I've actually built of late. A couple of years back a colleague from Germany was visiting. He took one look at the wiring mess behind the MIP and wagged a finger at me, "Germans would not be happy with such a sloppy job". Shamed to rethink my handiwork and planning ahead for a similar mess on the FO side, I came up with the following board for the MIP control card:
Why you ask? Well, I had to send the board back to CP Flight for tests (it stopped working) and un-wiring what I did have hooked up was a pain. This way if the card does fail, all of the lights and switches will be connected to the terminal blocks and not the card. Also, I don't have tiny hands nor eyes capable of reading 3 point font. The terminal blocks give me more room and an easier view of what I'm hooking up. Once the new MIP cabinets are complete, I'll rewire all of the lights and switches to this board with ribbon cable. One day Frank will be proud of me...
In bits sitting around my workshop is a partially built control column mechanism. Will get back to that in due course. And of course, the wrap around screen awaits design and build
Happened upon this video today while testing out some new AV gear I was installing. From a Belgian tv show (don't worry, there are English subtitles). Follow Tom has he tries his hand at flying a real 737-800. Admit it, you've always dreamed of doing it yourself should the pilots on your flight become incapacitated
And I'll be back to my build real soon - already took delivery of the 1st officer MIP screen.
More from me in the long, dark, Californian winter months (ok, it might rain for a few days...)
Another off topic post for you. As you may have heard there's a huge wildfire burning in California, close to Yosemite. A friend sent me a link to this video that gives you a co-pilot's view of what it looks like from a water bomber. Fascinating. Stick with it - they make the drop then avoid traffic on the way out.
Hard to believe that it has been more than 6 months since my last post. All work on the sim has stopped due to a higher than usual business travel load. As it happens, I was at KSFO yesterday when Asiana 214 came down. You can just make out the charred top of the plane from the photo I snagged - just to the left of the American elevator
Fire extinguished by the time I got to this vantage point. Very sad day.
One of the plus sides of the Continental - United merger is that I get to fly on a lot more 737s than I used to. Last weekend I flew down to LA to meet up with friends and snagged this photo shortly after departing KSFO 1L
Destination: Gianluca's cockpit. He and Linda graciously offered me dinner and an hour or so on his sim. We've been in touch over the years and Gianluca was probably the first to contact me after reading this very blog. Checking the blog history we discovered that December 8th 2009, 3 years to the very day we were getting together, I made my first posting. I can say without hesitation, Gianluca has come along a lot further with his build than I have:
And apologies for the shaky photos folks, all I had on me was the iPhone.
He has an overhead in that he put together himself and what an impressive job!:
Especially the wiring...
Given the enormity of the task and my lack of free time, I plan on going with the SimWorld plug and play version. It really adds to the experience and I know it's only a matter of time before I breakdown and place my order.
Now back to the flying. We decided on a quick flight from LAX to SAN then back again. The flight down was in the dark. As was I for most of the time... It has been so long since I've flown I was flubbing things left right and center. It is amazing how quickly you lose the muscle memory. Gianluca was very patient and was doing his best to be my FO, even though there was no seat or easy access on that side.
Landed at SAN ok. Came down just on the threshold, possibly a little short. No time to mess around, we switched to daylight mode, took off then flew back to LAX.
On the way we noticed that we were low on fuel on the left tank, the center tanks and right tanks were not being consumed. While Gianluca tried to figure out what was happening there, we lost both engines about 30 miles out from the runway. I disengaged the auto pilot and hand flew the plane while my FO tried to get the motors running. No luck.
Interestingly, you shouldn't be able to start the APU with no fuel in the left tank. It started but the engines wouldn't. Not sure if it was a logic issue with the overhead or whatever - we decided to try dead sticking the plane to the planned landing on 24R at LAX. Gianluca has a super scenery package installed (sorry, I forget the name) and he wanted me to see the detail.
We planned on lowering the gear at the very last moment so as not to introduce yet more drag. It looked like we were going to make it. Airspeed was ok and we had enough altitude to land the plane. I think I had flaps at about 10 degrees. Seconds before touchdown we were falling beneath the glideslope and the speed was bleeding off rapidly - nothing for it, drop the gear. And boy did we drop! Right into the In-N-Out burger parking lot on South Sepulveda Boulevard.
You can see from the photo above how close we were to landing safely. And the scenery package was very good - you could see the sign whip by, pretty much the way it looks in the photo. We overshot the drive through, crashed through the perimeter fence and onto the runway. All just as well, our non-virtual dinner was ready.
Many thanks to Gianluca and Linda for a lovely evening and for a reminder for me to get on with this project and fly more often than I do.
As winter closes in and my crazy travel schedule tapers off, it's time to get back to work on the sim.
As previously reported, I have most of the parts for the first officer MIP. This means redesigning the cabinet to house everything, along with the base the captain's side is currently sitting on. Before cracking on with that, I should probably focus my attention on the control column mechanism, since it will determine the height of the base. Hence the post title - lets start with the floorboards and move up from there (cue Paul Weller...).
While I'm at it, it's really time to consider how am I ever going to move this thing when finished? The new design will be more modular and will be easier to bolt together and tear down for maintenance. But first, the control column set up.
I've taken Ivar Hestnes' design as a starting point. You'll find it here. It's really quite ingenious. Especially the use of gas struts. I've failed miserably to find a strut which in its neutral position is neither compressed or expanded. My hope was to find something that would return to neutral after being pushed or pulled. Ivar gets around this by mounting regular gas struts in aluminium tubing. Very clever but I don't have access to welding equipment. And I'm too cheap to have someone weld it for me.
Which got me thinking, since even Ivar says his welded steel frame design is overkill, what if I made mine out of bolt together angle iron instead? It's cheap enough that if it doesn't work out, I can always use it as a prototype for the finished thing. Much easier to bolt and unbolt things than to weld and un-weld.
Armed with nothing more than the following tools on hand, I got to work using Ivar's dimensions:
A cut off saw:
4" grinder
A Swanson speed square
A hacksaw (surely you don't need a photo of one of these...)
Now before I show you the work in progress result, a quick reminder about safety with power tools if you intend to have a go yourself. Wear the appropriate safety gear and know what you're doing. When using the cut off saw and grinder, there are sparks flying everywhere. I was about to set to with just my glasses on when the wife stopped me in my tracks. Out came the full protective goggles to go over my specs.
And here is where we are so far:
Standing up on its end is one of the 2 control columns (3" pipe). It stands on the (soon to be) pivoting structure made with 2 bits of 2" angle iron bolted together. The pivot arms are made of more of the same. The rest of the frame is made out of 1 1/2" angle iron. In the foreground are 2 bits of 2" angle iron that will support the "gas" struts (more on this in a minute). Here you can see the beauty of working with angle iron - the brace on the right as been moved further to the right to "dry fit" the positioning of the strut (the left has yet to be moved). All easily done with the turn of a wrench.
Some tips if you try this yourself:
Cut matching pieces at the same time with the bolt holes lined up together. This will result in a more square structure
Assemble everything on a flat surface
Use a speed square (or something similar) to make sure all of your angles are at 90 degrees
Use bolts that are smaller that the cut outs in the angle iron. I used 1/4" bolts, the holes are 3/8". This allows you to fine tune the position of everything to ensure an accurate fit
Use locking washers to hold everything together tight
Make some simple braces to add to the rigidity of the frame (see left and right on the central spar)
Not shown in the photo, I also purchased some 1 1/4" square tubing to handle the torsional forces of the main pivot point. This will simply be bolted to the frame.
More close up shots for you:
Now I know this all looks a bit vague right now. It will come together in the coming weeks and I'll share progress with you.
Back to the "gas struts" and the main gubbins of this construct. I found another cunning design from Aerosim Solutions in Australia. He uses screen door closers to pull the control columns back to neutral. To get around the fact they only operate in one direction, they have come up with a slotted disk that allows the opposing closer to "disengage" when the rotation is in the other direction. Check out this video and you'll see what I mean (skip to 3:30 if you don't want to watch the whole thing):
Much easier for to fabricate a slotted disk than welding aluminum tubing.
As for the main pivot point, Ivar uses 2 x 1/4" steel plates! Way too much methinks. To prototype I simply cut a couple of pieces of 1/2" inch plywood, screwed them together and drilled all the holes the way Ivar had them. I may change this design to facilitate the Aerosim slotted plate design, here's what it looks like set on top of the frame with one of the 2 screen door closers:
The screen door closers are a great and inexpensive idea. I bought 2 heavy duty units from Home Depot at $10 a pop. The great thing about them is that they have an adjusting screw on them to control the rate of pull. Will they have enough pull to bring the columns back to neutral? That's the next step to discover. Stay tuned - flange bearings are on order from Amazon.
To close, the frame is lightweight - one person can easily pick it up, it's cheap, requires minimal metal working skills, allows for experimenting with placement etc. and appears to have enough strength to handle the loads we'll place on it.
Note: Re-posted with additional photos and bit more blether here and there...
Popped over to the UK for a very brief visit between business in France and Germany. While there Kevin, my brother in law, took me over to Blackbushe airport to show me around a charity fund raiser for Aerobility, an organization dedicated to providing the disabled with an opportunity to fly an airplane.
Kev is an air traffic controller in the UK. Along with his fellow members of ATCOS, they are heavily involved in the fund raiser. The idea is to beat the work record for longest flight simulator session, per rules laid out by the Guinness Book of Records. The goal is to raise £100,000 to cover the costs of the simulator and maintenance for 5 years. This follows a successful fund raiser for an actual plane, a TECNAM 2002JF they acquired for the charity.
Here are some pictures I nicked from other websites. First, some pictures of the sim, a Piper PA28
The big clock on the nose of the plane is for a time lapse camera, to demonstrate to Guinness that they really did fly the plane for the full duration.
There was no one there with any technical knowledge of the sim when I visited. Best I can tell it was a Microsoft Flight Simulator set up, with 5 projectors beaming on flat screens, as shown above. The rig was fixed, ie no movement of the platform. The plane looked like the body of a real Piper. The MIP seemed to have a couple of flat panel displays behind cut outs for where the various instruments would be. A very tidy job all around.
Shown below, the flight progress to the point in time I visited:
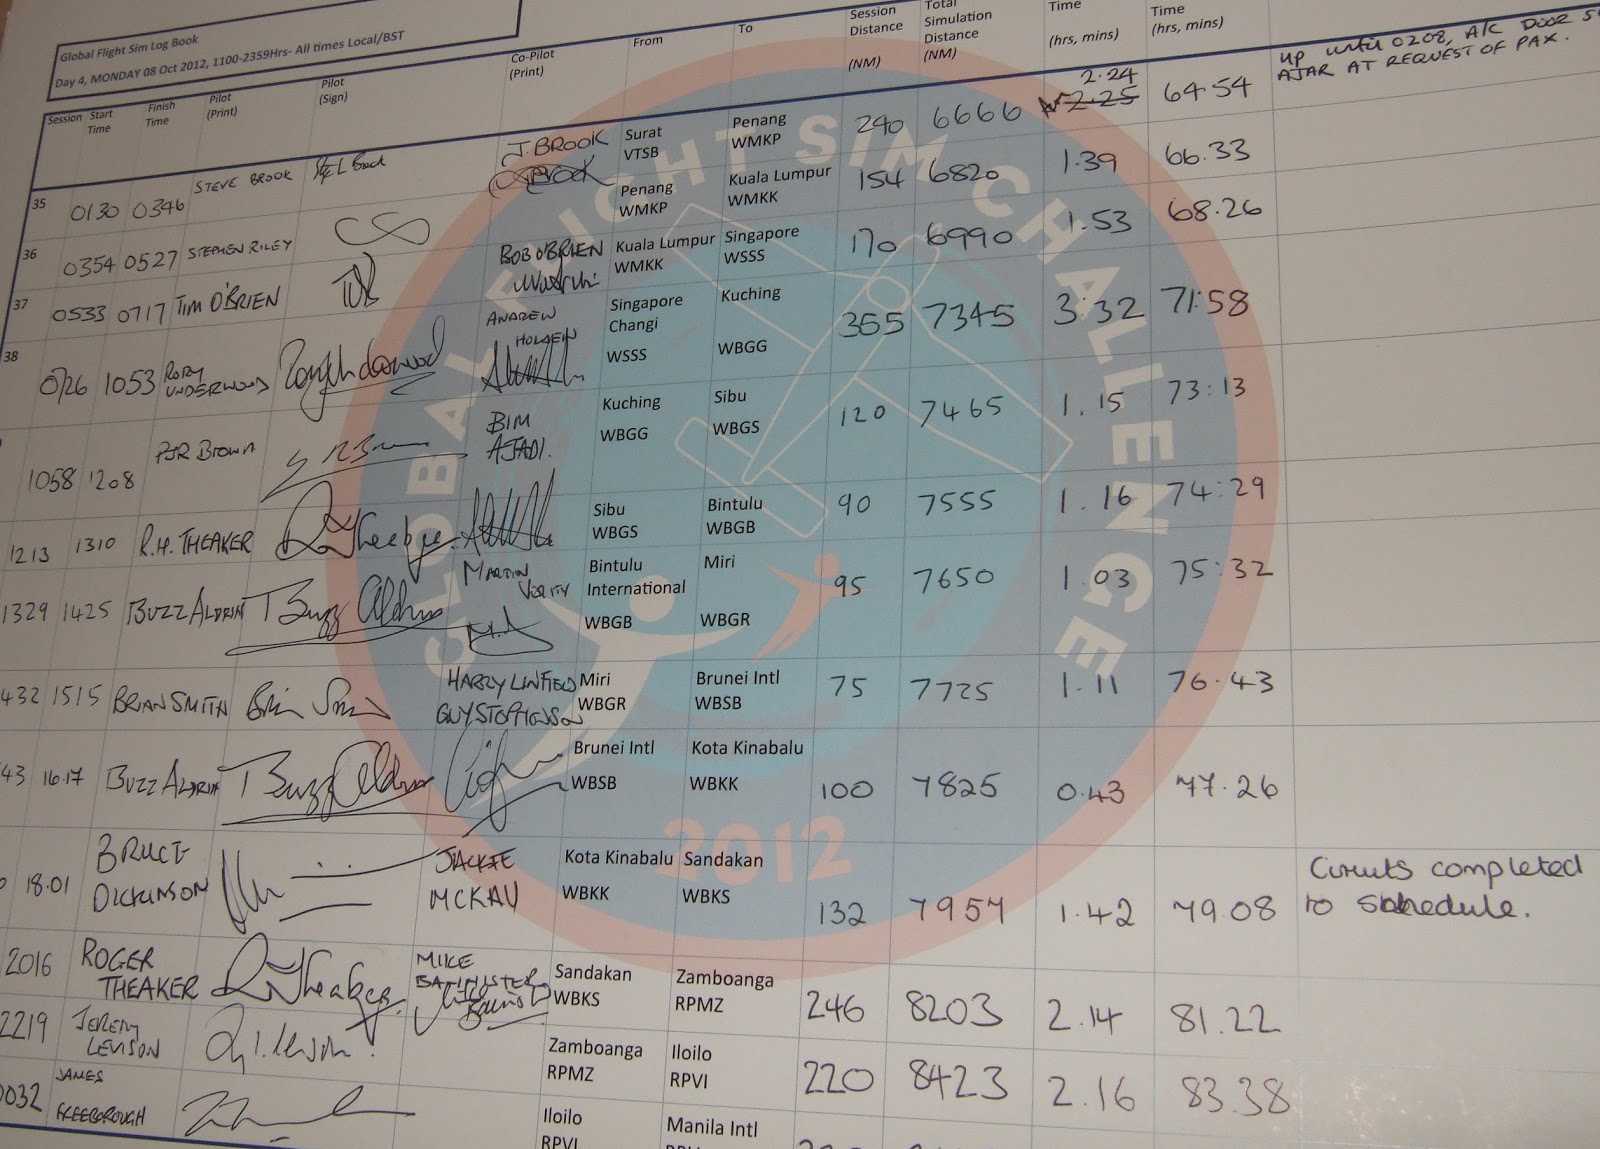
One of my personal heroes took a couple of stints at the yoke, none other than Buzz Aldrin. I got very close to him at the Evergreen Aviation and Space Museum a few years back but never got to shake his hand or let him know how much of an influence he had been to me as a kid. On the drive back, Kev casually mentioned that he did get to meet him, grab his hand and exchange pleasantries. Lucky bugger!
You can see his entries in the log book below. Looks like former pilot of "Ed Force 1", Iron Maiden front man Bruce Dickinson also had a go:
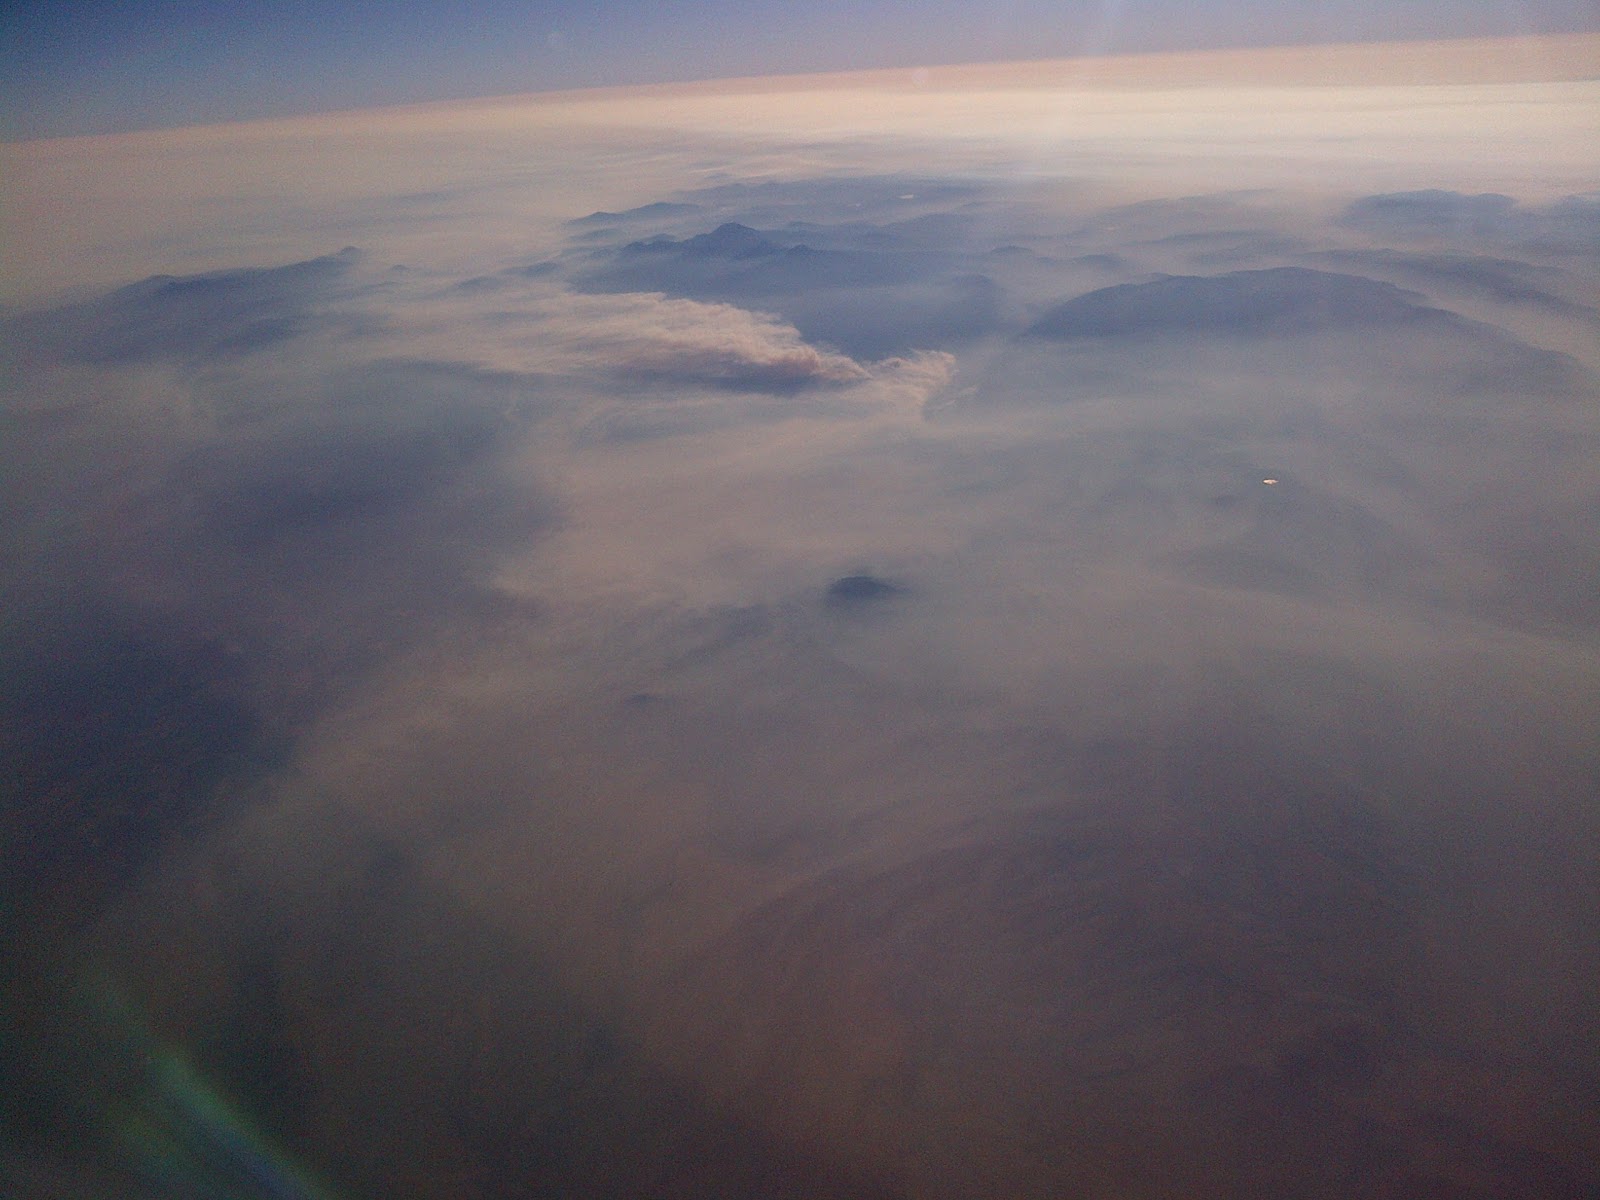
Headed north on a business trip yesterday. Flew over parts of Northern California that are battling forest fires. Most of the airspace around Redding and points north into Oregon were covered in smoke. I snagged these photos from my window seat (Embraer 190 if you're curious). That's smoke you're looking at, not clouds...


.jpg)